Quilted Starfields Observatory I
In April 2023, I finally realized the full potential of having a home in an astronomy village, by building a permanent observatory for the primary equipment (above) that I plan to use going forward. I had already repurposed a modest-sized existing shed as my warm/dry room, and prepared it for (initially) tripod-based astrophotography several yards outside the shed. I was prepared to image in this manner for an indefinite amount of time if needed.
A major trigger for the actual observatory project was the extremely generous gift of a 42" tall pier, shortly after commissioning the shed as a warm/dry room, from my good friend Scott Hanford of Myakka City, Florida. He had once used this pier but had since migrated to a new rig that required a shorter pier. The pier only gathered dust in the warm/dry room (shed) for about 4-6 weeks before a 48" deep, 24"x24" square hold was dug on my property, and concrete poured. In addition, I dug 2 trenches and ran underground pipes from the shed/warm/dry room, one for power to the pier and one for data between the pier and the shed.
The permanent pier was totally exposed to the elements at this point, although I certainly used it for a night or two before proceeding with the observatory build.
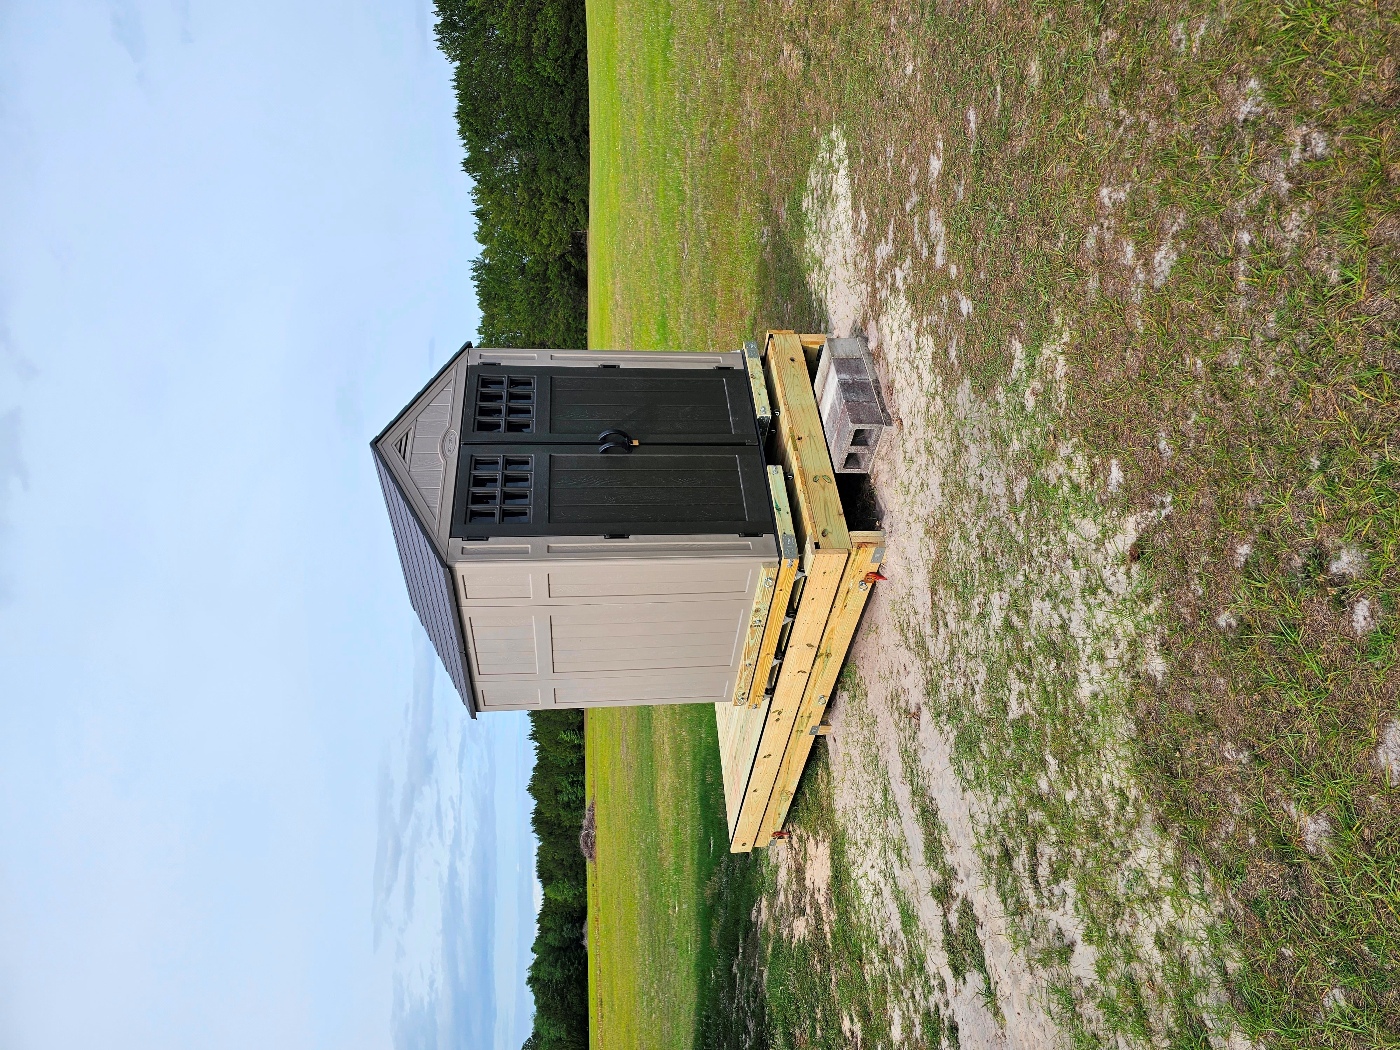
This observatory was literally years in the planning. The plans existed only in my head for all but about the last week. The observatory was only about a week and $3000, including the shed, in the making. I wanted a small plastic-resin shed that would either roll off at the roof or completely roll back on a moving platform. Given the height of the now pier-based equipment I have, the shed would have to be raised enough to clear the shed door. So, a small (7x14 feet) deck was needed as the base and track for the moving platform with the $800 shed from Home Depot as the enclosure. My friend and winter neighbor Dana Willis was kind enough to donate 8 all-metal 4" wheels and some old 2" wide, 1" deep iron U-channels from an old roll-off roof that he had decommissioned several years ago, thus saving me several hundred additional dollars in expense on the mechanics of the roll-back platform for the shed. (Dana also donated a ton of his time and construction knowledge to the building of the observatory, for which I'm very grateful.) The channel cleaned up nicely with a drill-based wire brush, at which time it was given a good coat of Rustoleum black spray paint. The wheels needed a similar clean-up with the wire brush.
The deck was built with 6"x6" posts (6 of them), three 2"x8"x14' boards joined as beams (one on each side), and 2"x8" joists resting on the two beams. Finishing off the deck was 5/4"x6" decking. All lumber is pressure-treated.
The rolling platform for the shed was made with 2"x4" for the framing and 4"x4" boards to hold the 4" metal wheels. Again, all pressure-treated lumber.
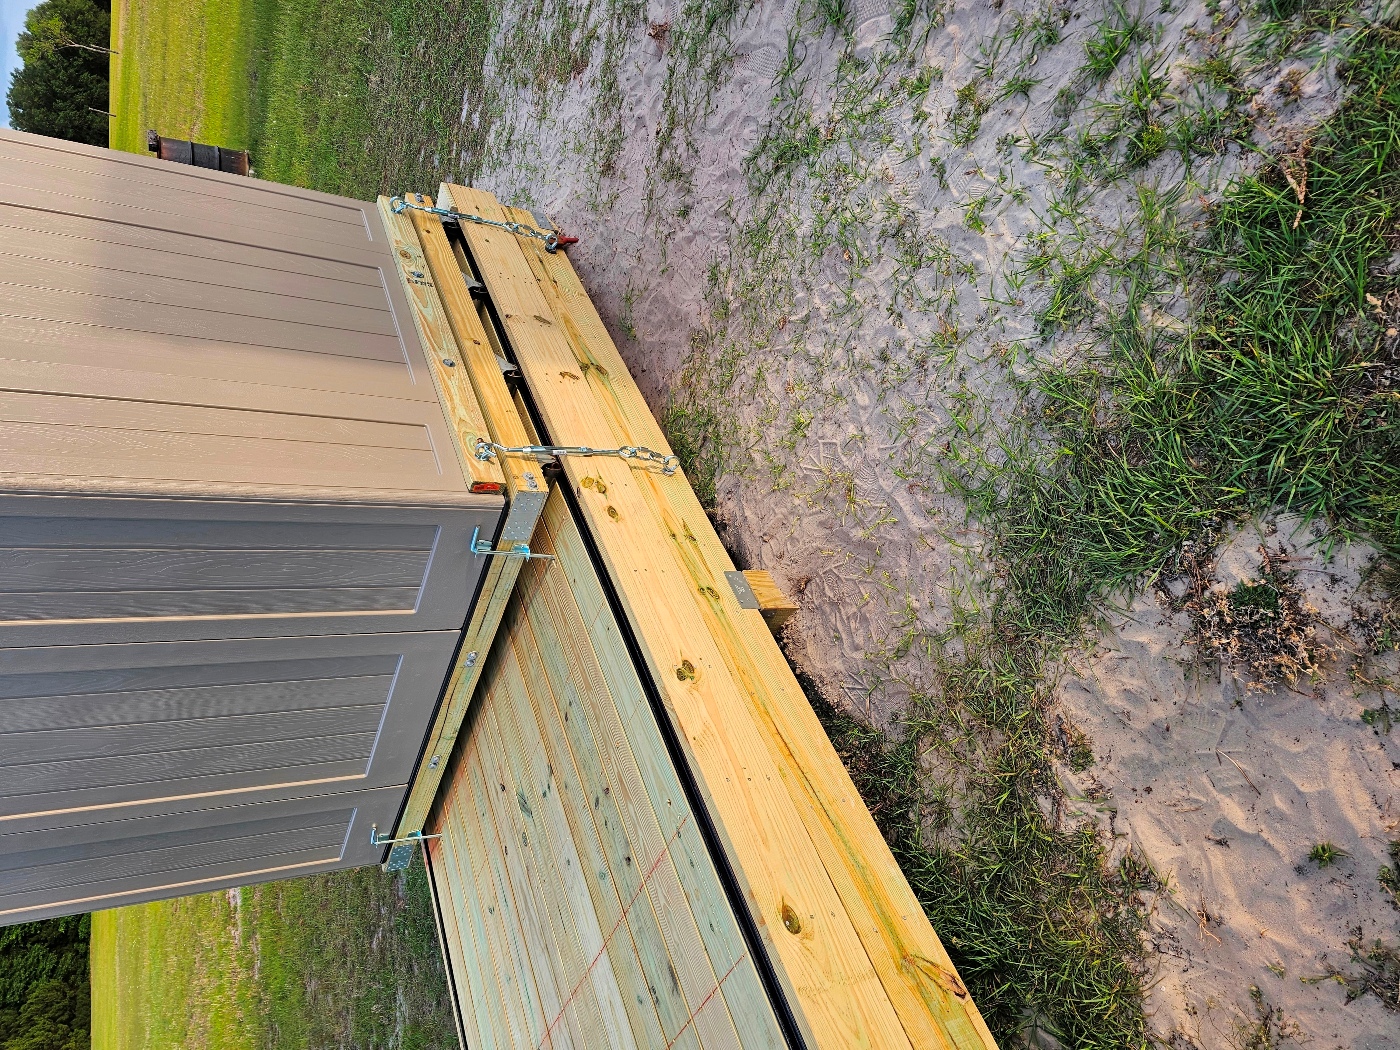
The shed required some "customizations". First, I needed to install tie-downs to hold the shed in place around the scope/mount/pier when the sometimes very breezy Florida winds pick up. This called for 2"x4" reinforcements at the bottom of both sides of the shed, inside and out, to serve as the platform for 4 large eye bolts. Second, the floor needed to be cut out around the pier and in the front middle so that when the shed was rolled back, it would clear the pier. I opted to save most of the cut-out floor and rig it so that it could be replaced in position when the building is rolled forward, thereby preserving the floor strength and providing for the bottom latch on the left door to still function. Then, I installed a heavy cane bolt at each corner that dropped through holes in the deck from the moving platform to hold the platform in place on the deck (either rolled back or covering the scope/mount/pier). Next, I reinforced the right door with outside latches so that the right door would remain tight against the left door, helping to make it more weather-proof. Lastly, I put a "real" lock and hasp on the doors to avoid using the really cheezy locking door handles the shed had as delivered. This required more wood on the back of the doors to reinforce the lock hasp.
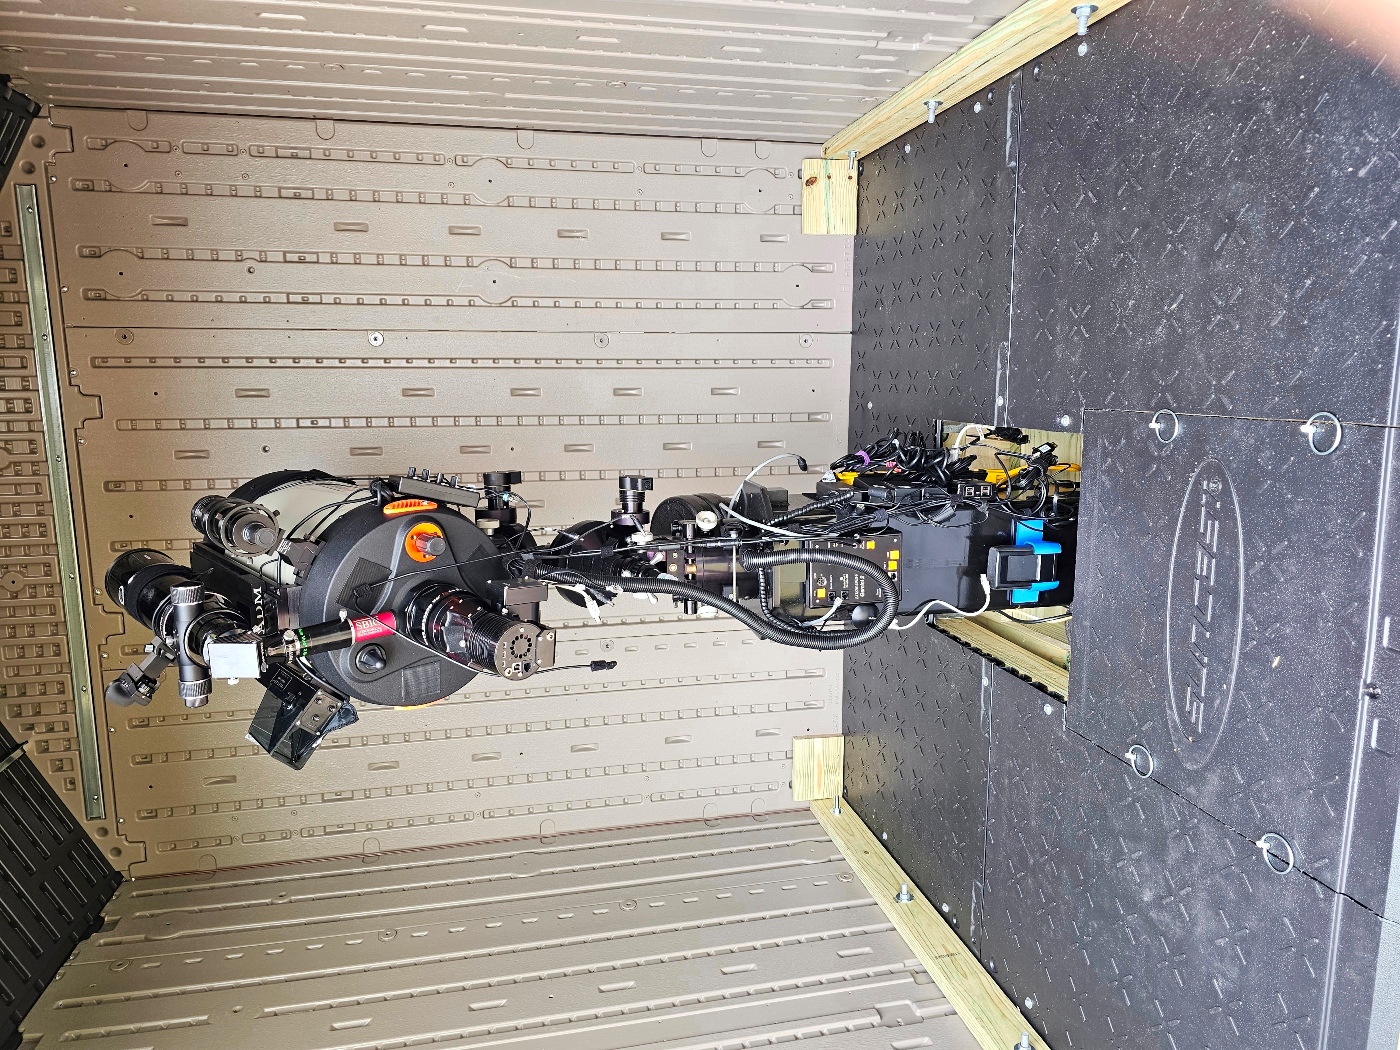
Since the observatory went into service, I have chosen a few "tweaks" to improve its function. I had intentionally made the deck and shed floor open about 18" square around the pier to provide for the ability to service the pier base if/as needed. However, I quickly learned that those Florida breezes brought plenty of sand up the hole and into the observatory shed, and onto the mount. So I installed some leftover 5/4"x6" decking around the hole to close it up better, which has helped a lot, and those are easily removable should I need to service the pier base. I also needed to put spacers to extend the eyebolts at the bottom sides of the shed so that the tie-down turnbuckles will function better.
The shed itself is wind-rated to 65mph, which is fine for the vast majority of the weather we get in Florida. The shed tie-down turnbuckles will hold the platform in place on the deck as well. For those few times when the wind will be higher, I purchased several 2" wide nylon straps, meant to go over the roof to the tie-down eye bolts in the deck beams on each side, and a strap or two to go around the middle to hold the sides and doors in place. Hopefully I'll never have to test these wind-hardening measures, but I have them if needed.
I intentionally built my observatory "on the cheap", due to other life priorities. It has been christened the Quilted Starfields Observatory, reflecting not only my astronomy passion but also my wife's quilting, sewing, and crafting hobbies.
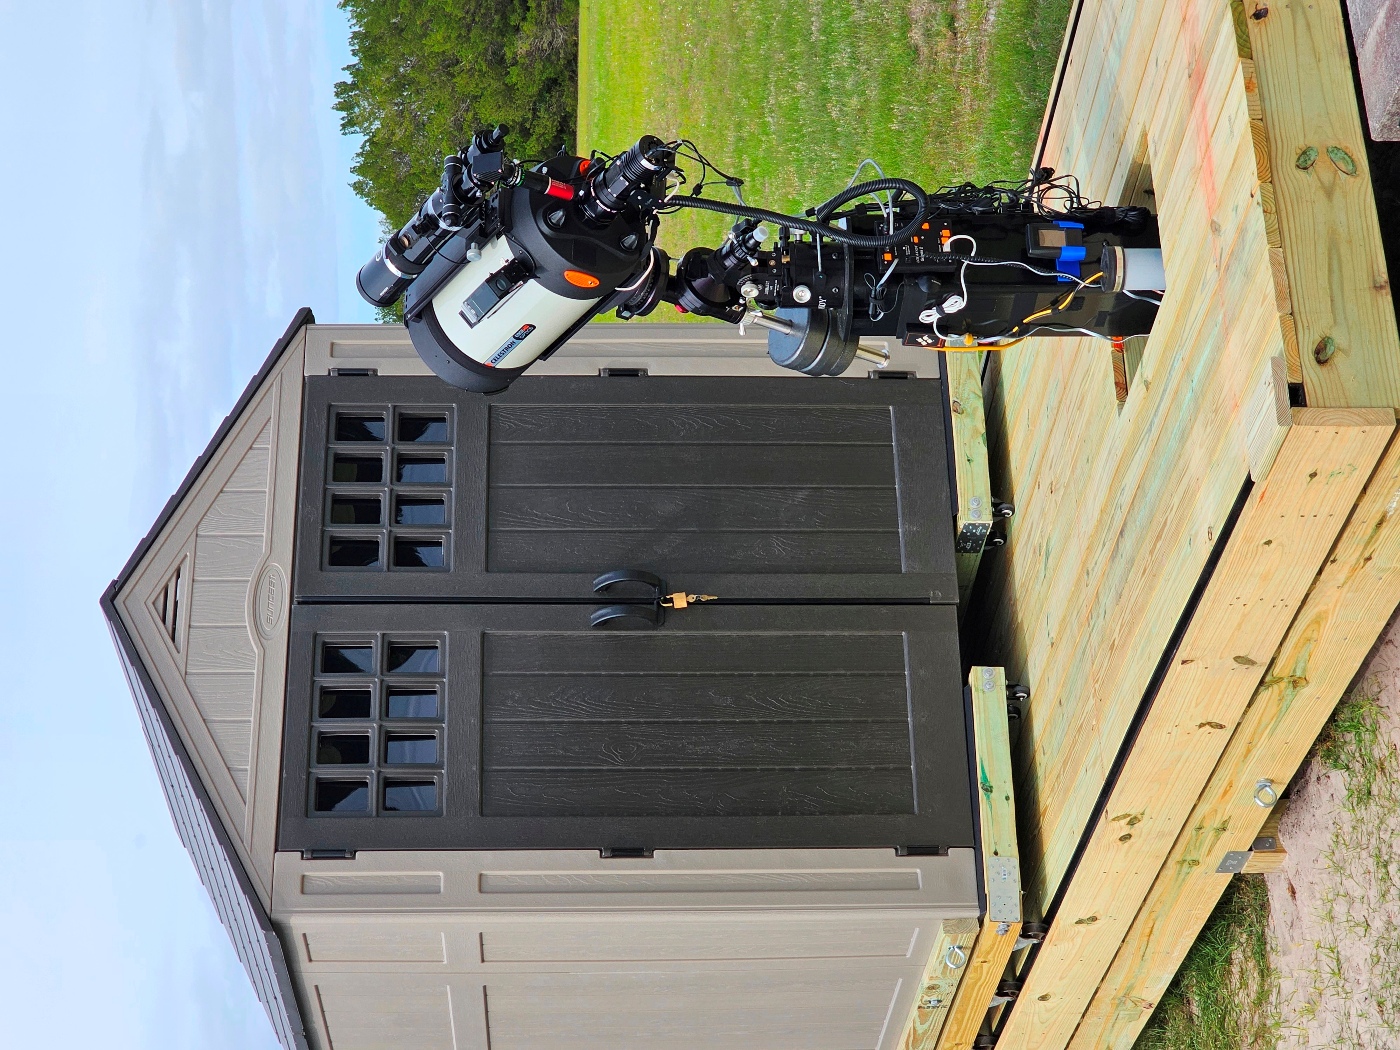
All rolled back and ready for a night under clear skies.
A look inside the shed/observatory.
A look at the details of the tiedowns and corner can bolts.