Quilted Starfields Observatory II
Then, October 2025 happened. There was a large astronomy gathering (we call them "star parties") here in the astronomy village in which I live, drawing many dozens of fellow astronomers. In the space of one day during the star party, while socializing with my fellow amateur astronomers, I not only took possession of a used (home-made) telescope pier (with some significant modifications needed but it was free), but I also fell into an amazing deal on a dome: also free! I just needed to get it relocated relatively soon from its existing location down the street. So, I ended that day saying to myself, "Wow, I own a dome!" And that was followed very shortly by "OH MY GOSH, I own a dome...now what?" So I went from thinking that QSO II would be a really small basic equipment cover to a full-on professional-grade dome, for free, that can still be purchased brand-new if you happen to have $12K-$16K. I'm still in shock!
So, I quickly designed and with my friend and neighbor Dana's help, built a short 10x10-foot deck to receive the dome (ask me about mixing and pouring 112 bags - or two full pallets - of concrete) in a completely different place on my property than I had been thinking. I then organized the move for December 2025, when a team of 10 of us moved the dome, FULLY ASSEMBLED, up the street to my backyard, on a neighbor's open trailer. So, only about two months after I was still imagining and planning my small, minimalist second observatory, I headed into a VERY different setup. QSO II could well become my primary imaging setup, although QSO I is still very important to me.
It's now ready and in use, and is commissioned Quilted Starfields Observatory II. I'll still have, love, and use my older observatory, now known as QSO I. But I will have the flexibility to use either or both QSO I and/or QSO II on any given good night, depending on what object(s) I want to shoot and what equipment it will require.
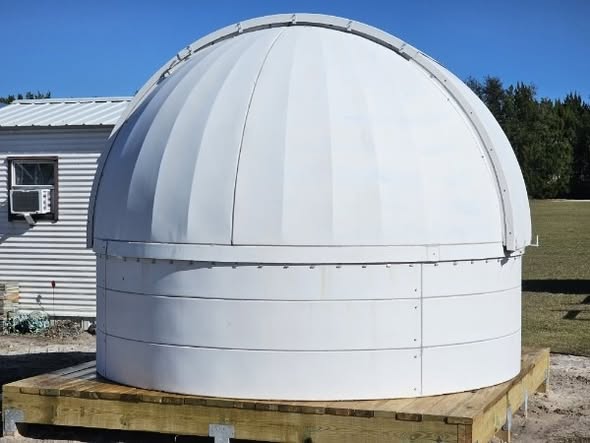
About the dome. It's a 10-foot fiberglass ProDome made by Technical Innovations, new to me but used. The first picture below shows how it is after the move, all cleaned up by a pressure washing and looking almost brand-new.
Much work was needed to make it operational. I had to finish getting it electrified. There is a motor that was partially installed to operate the dome's opening (called a "shutter") that I had to get fully installed and working. (The shutter worked manually but it's heavy and tricky so I considered the motor a must.) The pier for the telescope needed to be installed onto the concrete base I poured in the center of the deck inside, and a telescope mount and optical tube (with a camera, of course!) had to be installed on the pier and properly aligned. And although the dome has motors to turn it so that the open shutter can be where the telescope is pointing, it was a manual operation via a toggle switch inside at present. So I implemented an automation solution so that the dome shutter will be able to automatically follow the telescope while it's tracking on an object I'd be photographing. The dome is now getting a lot more love and use at my place than it has had in a very long time.
I chose to use a VERY much DIY solution for the dome's rotation automation due to cost. I estimate that I spent roughly 10-15% on it versus what the manufacturer's solution could have set me back. I had to put in a ton of work to make it happen but it was kinda fun and a bit scary at the same time. But it works! The solution is based on the LesveDome.net system and uses an assembly-needed Velleman 8055n USB-based control board, along with a couple of relays, an azimuth sensor assembly and some wiring. The LesveDome.net system is ASCOM-based and basically manages the signaling to the Velleman board to move the dome rotation clockwise or counterclockwise a specified amount, using the azimuth sensor (and a magnetic home sensor) for position information. I use NINA for all the heavy lifting of where the dome actually moves and how often, because the math involved is very much non-trivial. NINA has dome control built-in and it works great, talking to the LesveDome.net solution via ASCOM.
I run this dome-based imaging rig from the same warm/dry room that I've been using for several years to run QSO I. I have also graduated from a cable-centric connection scheme to running both QSO I and now QSO II remotely over wi-fi, and all the cabling is contained on and at the telescope only.
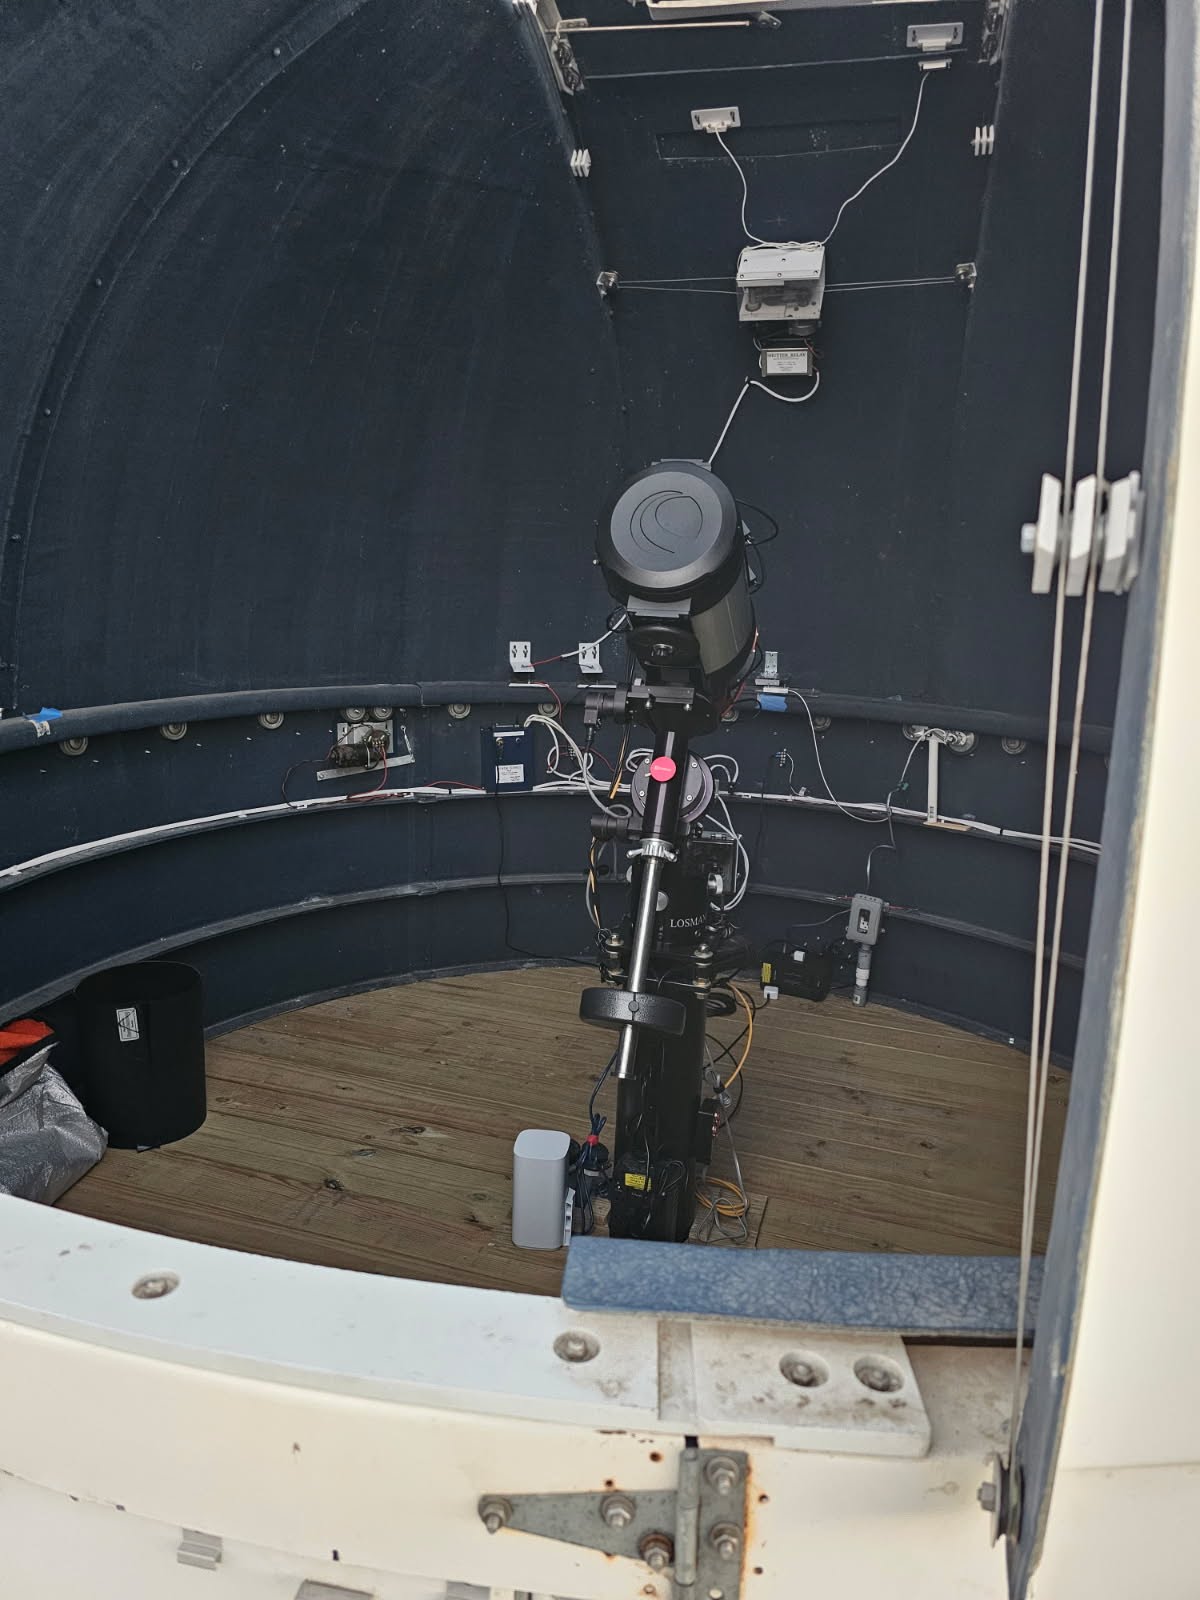
The second photo shows the initial imaging rig, my 8" EdgeHD telescope on a Losmandy G11 mount. I'm using a ZWO APS-C monochrome astro-camera, 26 megapixels.
The initial rig installed in the dome. Note the shutter motor boxes and cables on the upper back of the dome, and one of the rotation motors and power supply on the lower part to the left of the scope in this picture.